Signup & Studio Setup
Signup & Studio Setup
This article covers the signup flow and studio settings in detail — the first step of using ClassGo.
Creating your studio
Click Sign Up in the top-right corner of the homepage:
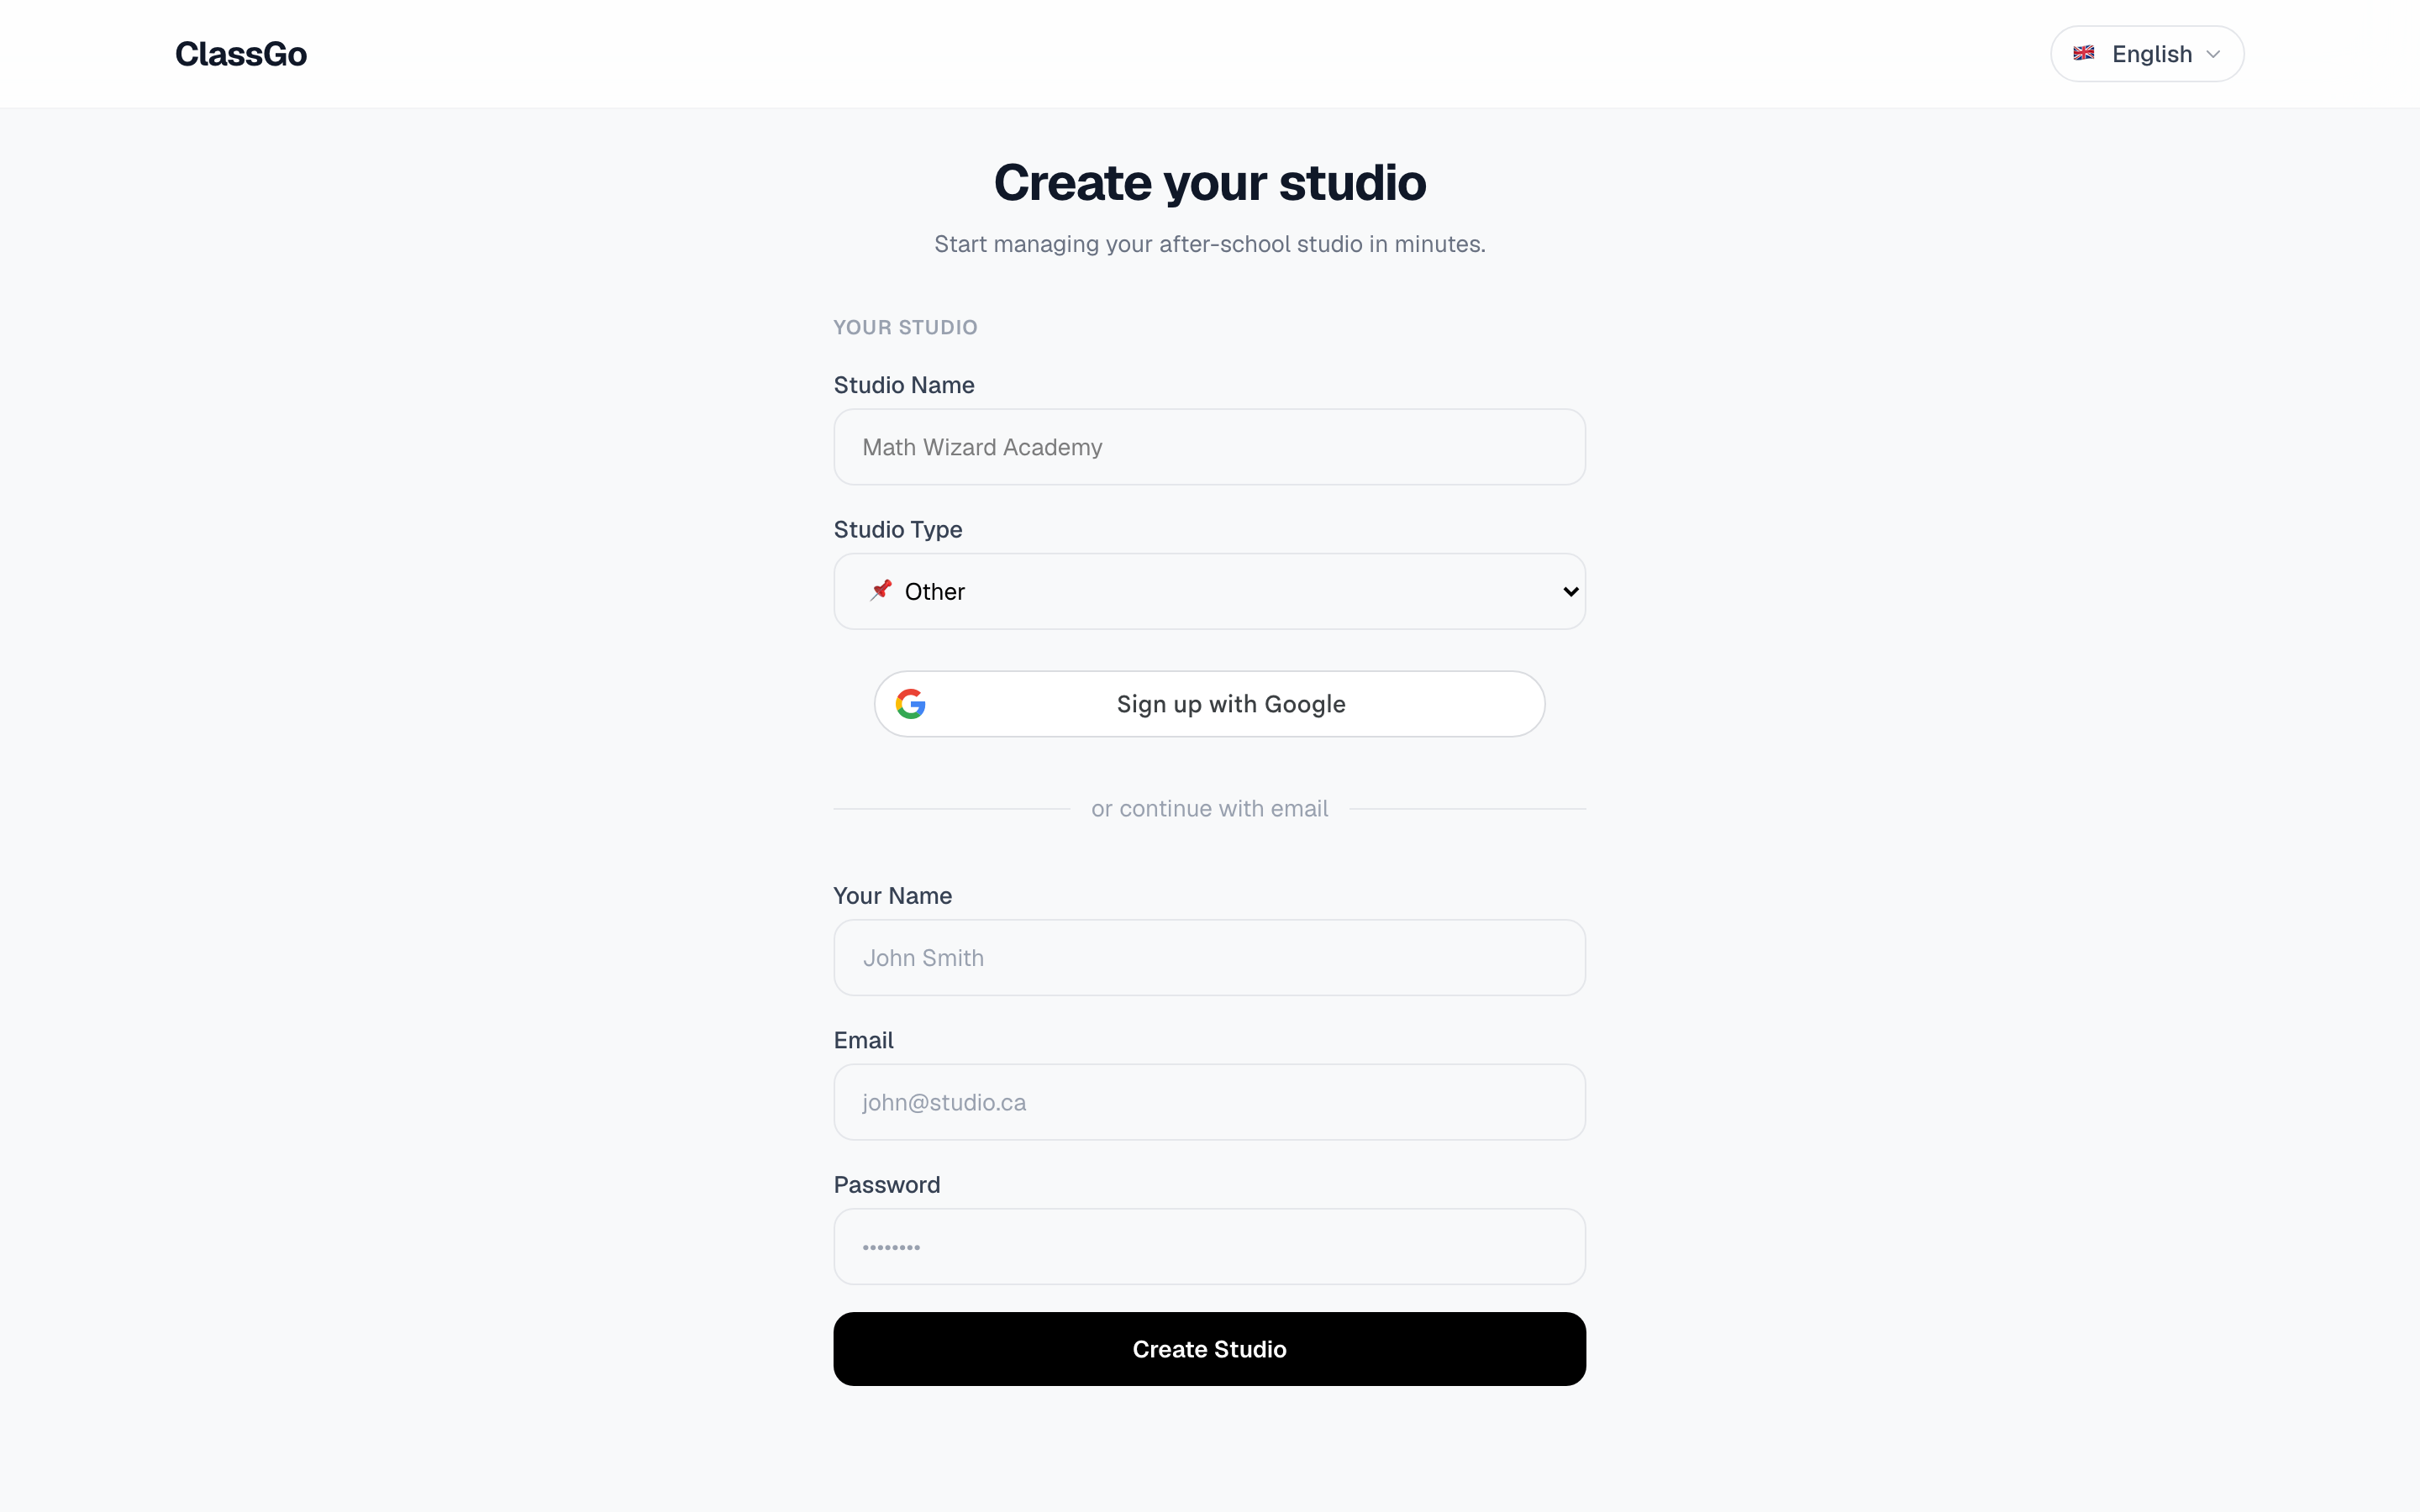
| Field | Notes |
|---|---|
| Studio name | Shown in the sidebar and on schedules. ⚠️ Cannot be changed after creation — choose carefully (contact support@classgo.ca if you need it changed) |
| Studio type | Pick from martial arts, dance, music, art, tutoring, fitness or other |
| Your name | Your name as the owner, shown in the member list |
| Your login account; also receives notifications and invoices | |
| Password | At least 6 characters; use a strong one |
💡 You can also click Sign up with Google for one-click registration.
After clicking Create Studio, ClassGo automatically:
- Creates your studio on the Free plan (1 teacher slot, 30 students)
- Creates your owner account and logs you in
- Takes you to the dashboard
Completing your studio info
In the dashboard, open Settings from the sidebar:
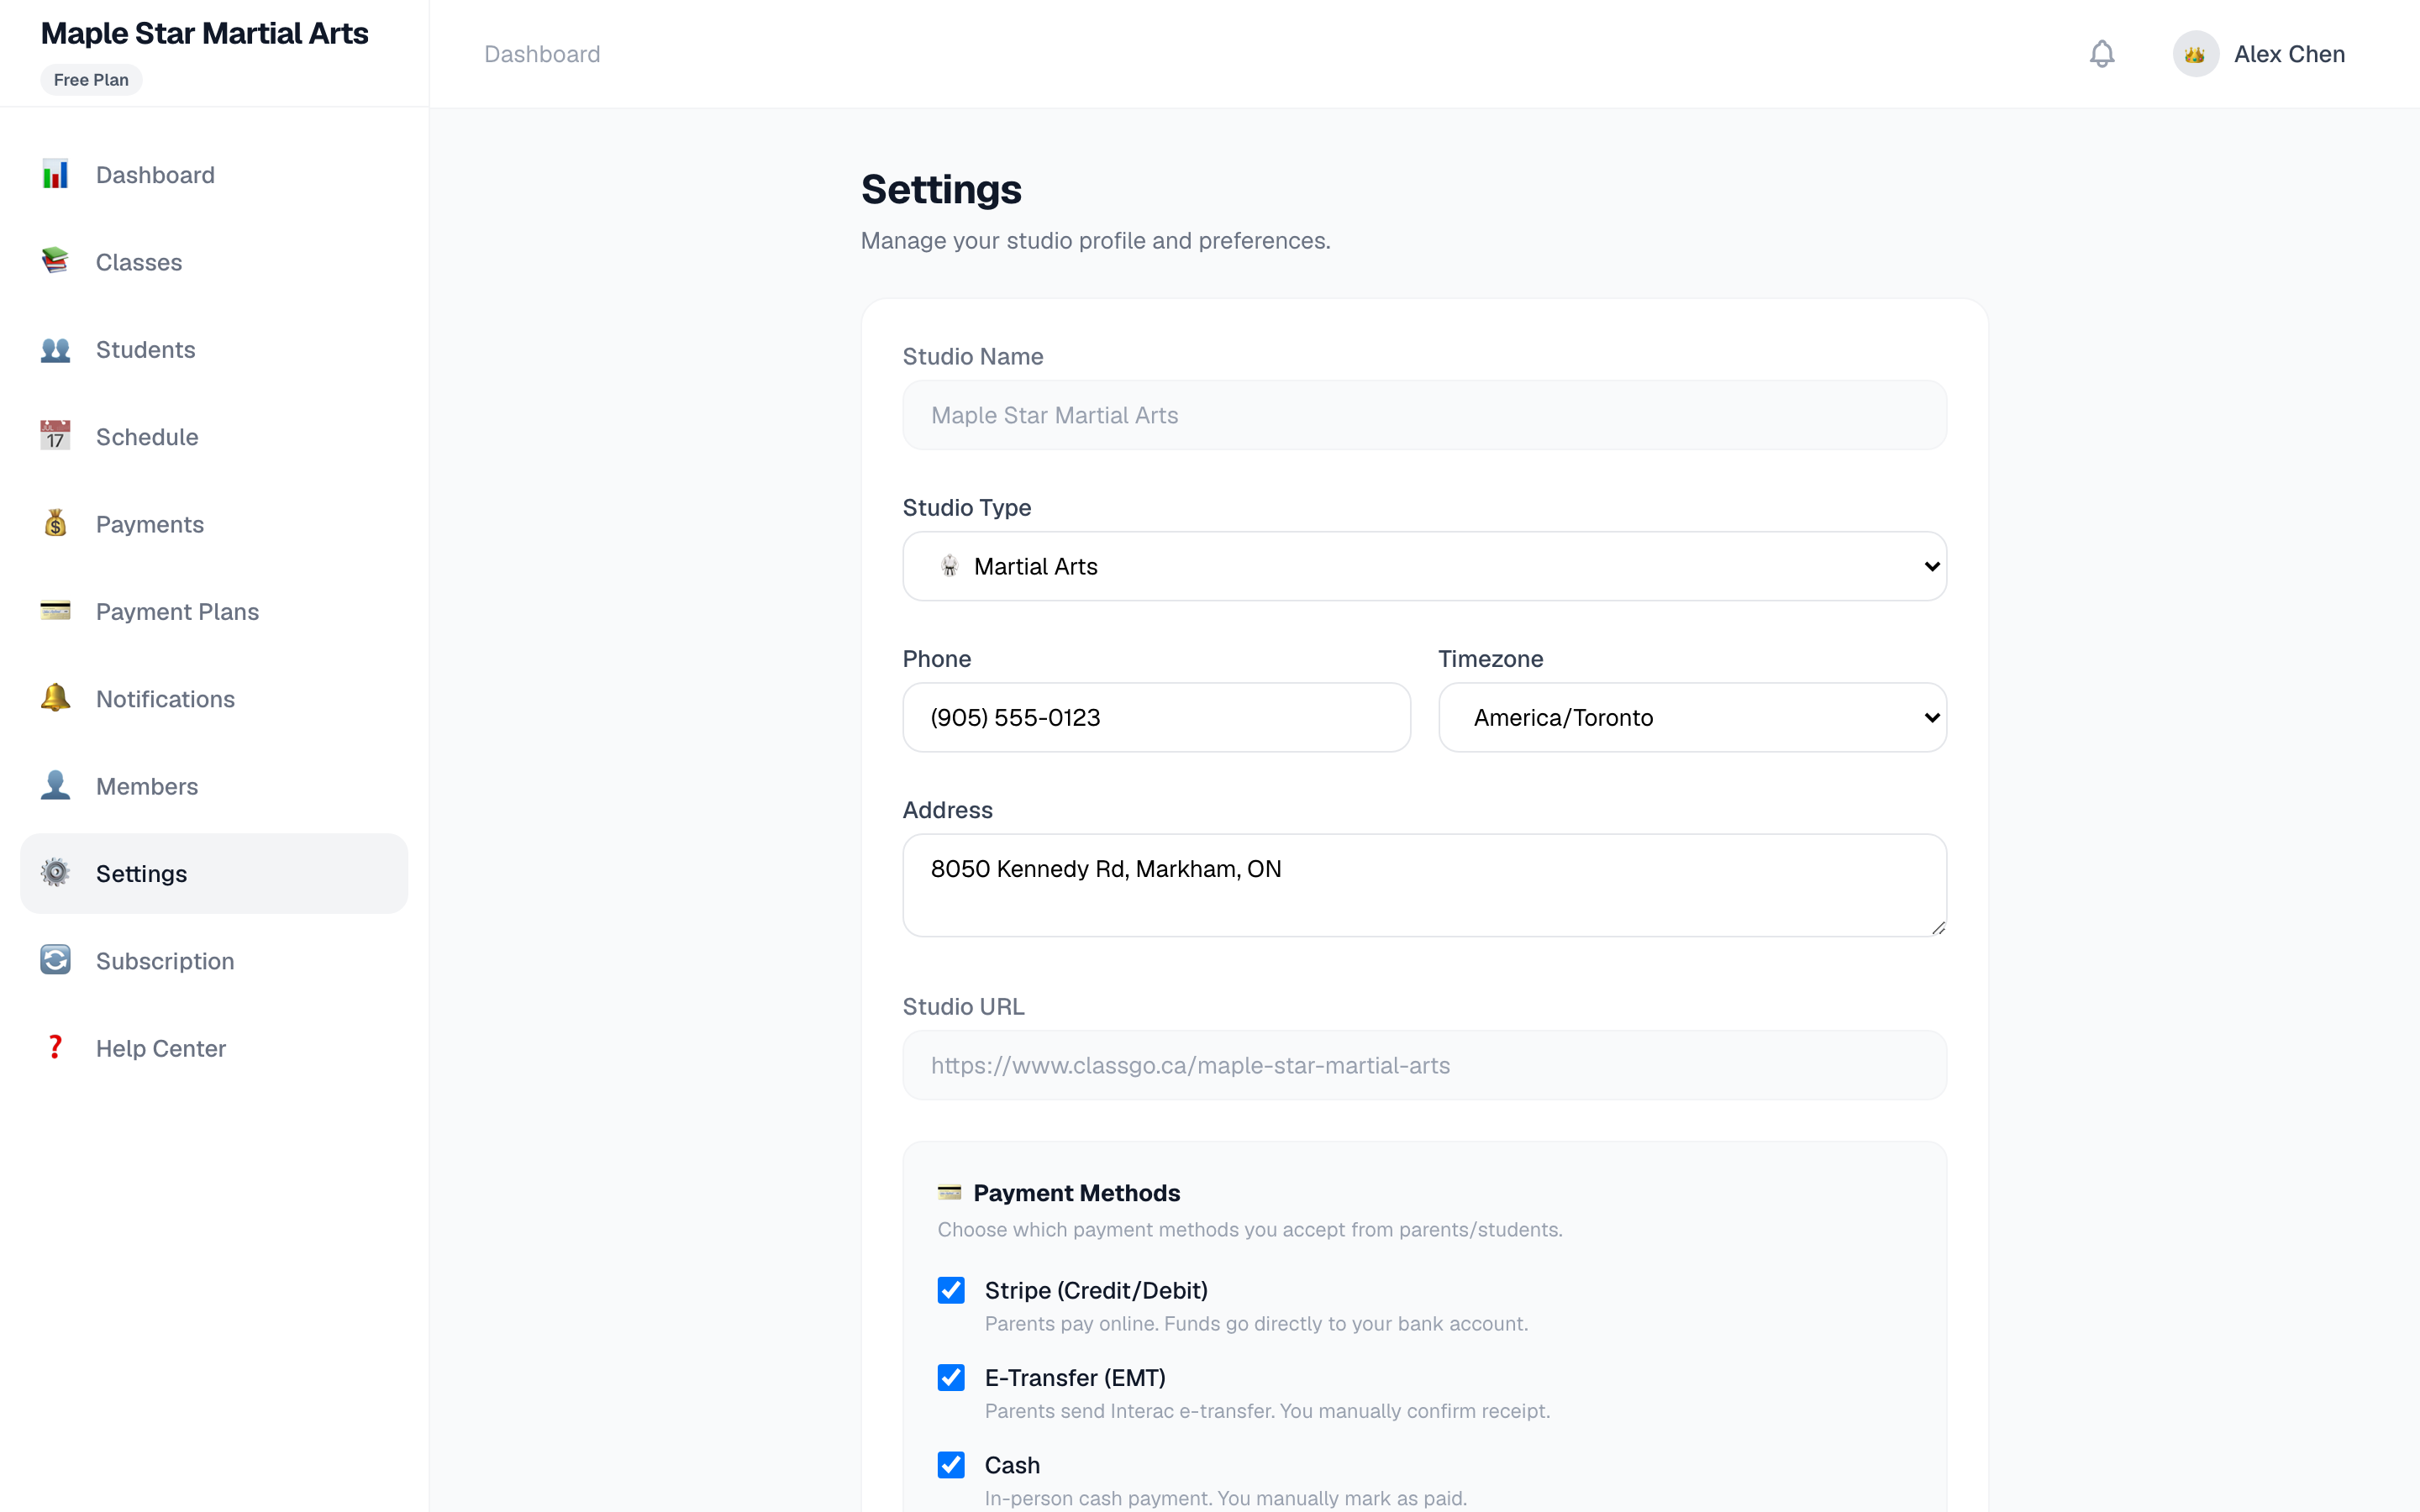
Basic information
| Field | Recommendation |
|---|---|
| Studio type | Correct it here if you picked the wrong one at signup |
| Phone | Your front desk/contact number, shown to parents |
| Timezone | Defaults to America/Toronto. If your students are in another timezone, choose it and schedules will display accordingly |
| Address | Your physical location, used for directions and emergency info |
Payment methods
Check the payment methods you want to accept — parents will see these options when paying:
- Stripe (online card): instant payment, auto-marked as paid
- e-Transfer: parent transfers, taps "I've paid", teacher confirms
- Cash: paid in person, teacher marks manually
💡 We recommend enabling Stripe online payments — zero waiting for parents and no manual reconciliation.
Notifications
Configure which notifications teachers and parents receive (schedule changes, payment reminders, etc.).